OUR PAVERS INTERIOR PROJECTS


Outdoor pavers instantly enhance the surrounding area. You can use pavers from Glenser to improve the patios, paths, courtyards, pool surrounds, entertaining areas, and also driveway. If you are a DIYer you should consider paving your garden.
What do You Need?
Garden Gloves
Spade
Wheelbarrow
Road Base
Rubber Mallet
River Sand
Ear muffs
Jointing sand
Spirit level
Cement
String line
Trowel
Whacker packer
Straight edge
Brick saw (optional)
Broom
Straight Edge /Screeding Rail
Installation Process
1. EXCAVATION
Clearly mark the region that is to be paved and ensure there is additional space for the activity.
Get rid of grass, stones, soil, vegetation and any other debris.
Make sure the excavated depth is sufficient for sub-base construction and selected paving. 100mm of road base and 30mm of sand including paver thickness is adequate for pedestrian paving. Driveway paving is quite different from pedestrian paving.
2. BASE PREPARATION
The road base should be evenly distributed over the area to be excavated taking into account the general fall.
Use a whacker-packer (plate compactor) two times to compact the base of the road
Start spreading /scattering the sand on the compacted region until a thickness of between 25 and 30mm is attained.
Use a straight edge or timber float to screed the sand from the river. Use a level to maintain uniformity.
3. PLACING THE PAVERS
Mark the edge of the area to be paved using a string line. This assists in making certain the pavers are aligned and flush.
Start placing the pavers from one end moving across. A gap of 3mm is maintained within the pavers to enable the sand for joining to be swept in-between later on.
The string line should be square with every paver and use a spirit level to check if the surface is level. Paves are wriggled into place when placing or by tapping with a rubber mallet.
4. PAVER BINDING AND LOCKING
To lock or haunch header courses that are not against the wall it is vital to use cement and sand mix. This offers the right support to external course of the region to be paved. To achieve this, small cement and sand mixes are made inside the wheelbarrow. The mix is screeded along the paver’s edge to a height of about 75%. This maintains the paver’s position and also locks it in place.
HELPFUL TP: Using a bit of cement and sand mix on the base of the external header course improves the overall strength of the area.
5. BINDING SAND AND SEALING
The final step is to add locking sand or sand from the beach. This sand can be bought from the local dealer. Sweep it into the 3mm gaps in-between the pavers.
After the sand settles between the gaps place an old piece of rug or carpet underneath the whacker-packer and start compressing it. This process also creates a smooth finish.
Hose down or wash the area after finishing.
Sealing is an optional step, which improves the final appearance of the paver. It also guards it from daily wear& tear, the elements, stains, food fats and more. It is advisable to go for quality sealers that have been tested and approved.
Finally, the last step is taking pleasure in your new surrounding!
Check out the blogs we have gathered to get you excited into finally creating our dream home and creative spaces.

COLORS FOR BEDROOM IDEAS 2020
We all want to inject a little color into our bedroom but it's one of the hardest rooms in which to get the balance right.
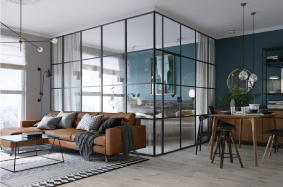
THE IMPORTANCE OF SOFA’S AND FURNITURE
The concept of how to choose a sofa seems pretty simple, right? You go to the store, you look at it, you sit on it, and then you buy it.
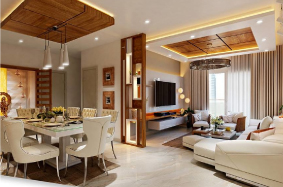
MODERN LIVING ROOM DÉCOR 2020
Living rooms are the most public room in our homes. It is where we usually receive and entertain guests.
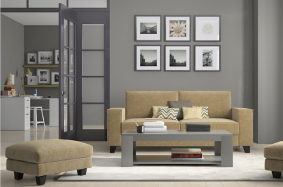
HOME DÉCOR IDEAS
2020
For many of us, the hours spent at home have risen sharply in recent weeks as we adjust to life during the Covid-19 pandemic.
Glenser Interior Studio is in partnership with exemplary and astounding design partners to help your dream home come true.


Glenser is an Interior Design Studio established especially with a passion to bring life to your dream home and our services are always tailor made to meet the specific needs of each client
We are driven from highly imaginative design solutions that satisfy human, physical, technical, aesthetic and functional needs of designing.
We have mastered the perfect combination of light, space, creativity, technology and all the fine details necessary to create an unforgettably luxurious experience for everyone utilising the space.